Install the SOS Collab Servers and MSDE - Typical Setup
Use this installation package: sos_collab_servers_ msde.exe
This is a 70MB package that installs the SOS Collab Servers and an MSDE database. If you are downloading the installer, select the option "Save this program to disk," and save it to the C:\_SOS or other folder on your hard drive which has a short path. If you have an SOS Collab CD with the installer, you can run the setup directly from the CD-ROM drive. The MSDE installation requires a short command line in order to successfully install.
The SOS Collab Server installer will download as a self-extracting archive
or run from CD. Installation of SOS Collab with MSDE is a lengthy process and
may take up to 25 minutes.
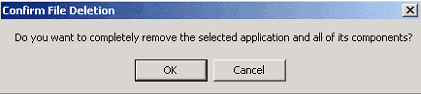
If the uninstall program detects an existing SOS Collab installation this dialog
will be presented:
Proceed with uninstall instructions before reinstalling the program.
Run the Installation Program
License Agreement
To continue with the SOS Collab with MSDE installation program you must accept the license agreement for SourceOffSite Collaborative Edition 1.1.2. Read the agreement, and click Yes to proceed.
Microsoft Visual SourceSafe License Reminder
If you are using SOS Collab to access a SourceSafe database, you must be a
legally licensed user of Microsoft Visual SourceSafe. A Microsoft Visual SourceSafe
License Reminder dialog will be presented. Click Yes if you are either a legally
licensed SourceSafe user or if you will not be using SOS Collab to access a
SourceSafe database.
Choose Destination Location
By default, the SOS Collab Servers will be installed in C:\Program Files\SourceOffSite
Collab Servers. To choose a different folder, click Browse. Select the desired
folder and click OK.
Setup type
Typical
For first time installations, we recommend the Typical Setup, which installs the default configuration. These default settings can be changed later with the SOS Server Manager.(Please Note: The default port for the SOS Collab Web Server is port 80. If the server machine is running IIS on port 80, after installation use the Server Manager to change the port number for the SOS Collab Web Server to a port not being used by another application.)
Custom
Advanced SOS Collab users may wish to use the Custom Setup to configure the SOS Collab system during installation.
Select Program Folder
The Setup program will add program icons to the SourceOffSite Collaborative
Edition folder. You can choose the default SourceOffSite Collaborative Edition
folder, type a new folder name, or select an existing folder. After selecting,
click Next.
Compatible Data Engine Found
If the Compatible Data Engine Found screen appears, Setup
has detected an existing MS SQL Server or MSDE installation on your machine.
Proceed with installation using the sos_collab_servers_no_
msde instructions.
Choose Microsoft Data Engine Destination
By default, the Microsoft Data Engine will be installed in C:\MSSQL7. To choose
a different folder, click Browse. Select the desired folder and click OK.
The Setup will calculate whether you have enough disk space (77MB) to install
MSDE.
Database System Administrator's Password
Create a password for the database system. Type the password again to verify
it. MSDE uses this password to control which applications have access to MSDE
data.
SourceOffSite Collab Servers Administrator Information
Primary Server Service Setting
If the VSS database is on the same machine as the SOS Collab Primary Server,
select the log on as the Local System account.
Select Use a Domain User Account if the VSS database is on another machine
on same LAN as the SOS Collab Primary Server. The SOS Collab installer will
authenticate the user account on the domain.
Server SMTP Configuration
SMTP Server
The SOS Collab system sends email notifications to users about bug events and discussion messages. Enter the name of the SMTP Server that will be used by SOS Collab.
From Address
Enter the address that will appear on the email notifications from the SOS Collab system. An email address must be configured here with the proper format, i.e. name@company.com. However, this does not have to be an actual working email address.
Review Install Information
The Review Install screen shows the information you have provided during
the Server Setup, along with the SOS Collab system default settings.
You can change information you have added during the Server Setup by selecting
the Back button. System default settings can be changed after installation
by using the SOS Collab Server Manger.
Setup Status
Setup installs certain components and creates SSL certificates.
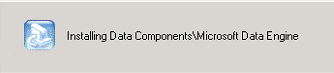
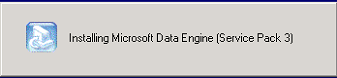
Installing Data Components/Microsoft Data Engine
During the MSDE installation process, Setup will install the Microsoft Data
Engine, stop MSDE, and upgrade MSDE with Service Pack 3. You will see these
dialogs on the screen. Installing MSDE is a lengthy process, up to 25 minutes.
Your cursor may change from an hourglass to a pointer, and then back.
Do not exit or close the installer window during this time, as it will stop the installation process.
Creation of Database Tables
The installation of MSDE also creates database tables (schema).
Installation Complete
Once the Server installation is complete, click Finish.
(Please Note: If the services tried to start and failed, a computer
reboot is required. If you are presented with a dialog to restart your computer,
do so at this time.)
Verify Files Are in Selected Folder
After the installation is completed, assuming that default installation location
was accepted, the SOS Collab Servers will be found in C:\Program Files\SourceGear\SourceOffSite
Collab Servers.
The notable files installed in that folder are:
sosce_server.exe -- Primary Server program
sosce_web.exe -- Web Server program
sosce_config.xml -- Server configuration file
sosce_svrmgr.exe -- Server Manager (GUI tool) for configuring and managing the Servers
If you wish to change any of the installed settings, use the SOS Collab Server
Manager.
Delete Installation Files
After successful installation, delete the installation files in C:\_SOS. This
will free up 110 MB of space on your hard drive
Next Step: Project Setup